
One of the biggest reasons beginners fail at mushroom farming is not bad spawn, not poor humidity, and not the wrong growing space. It is skipping pasteurization or doing it the wrong way.
If you skip this step, mold and bacteria get into your substrate before your mushrooms can grow. Your bags turn green or black. Your batch fails. And you think mushroom farming does not work. But it does work. You just need to do this one step right.
This guide will show you exactly how to pasteurize mushroom substrate, step by step, using tools you already have at home.
Table of Contents
1. What Pasteurization Means
2. Why It Matters for Mushroom Farming
3. Step-by-Step: Hot Water Pasteurization (Beginner Method)
4. The Right Temperature and Time
5. Cold Pasteurization: The Lime Bath Method
6. Common Mistakes Beginners Make
7. How to Know It Worked
8. What to Do Immediately After Pasteurization
9. Conclusion
1. What Pasteurization Means
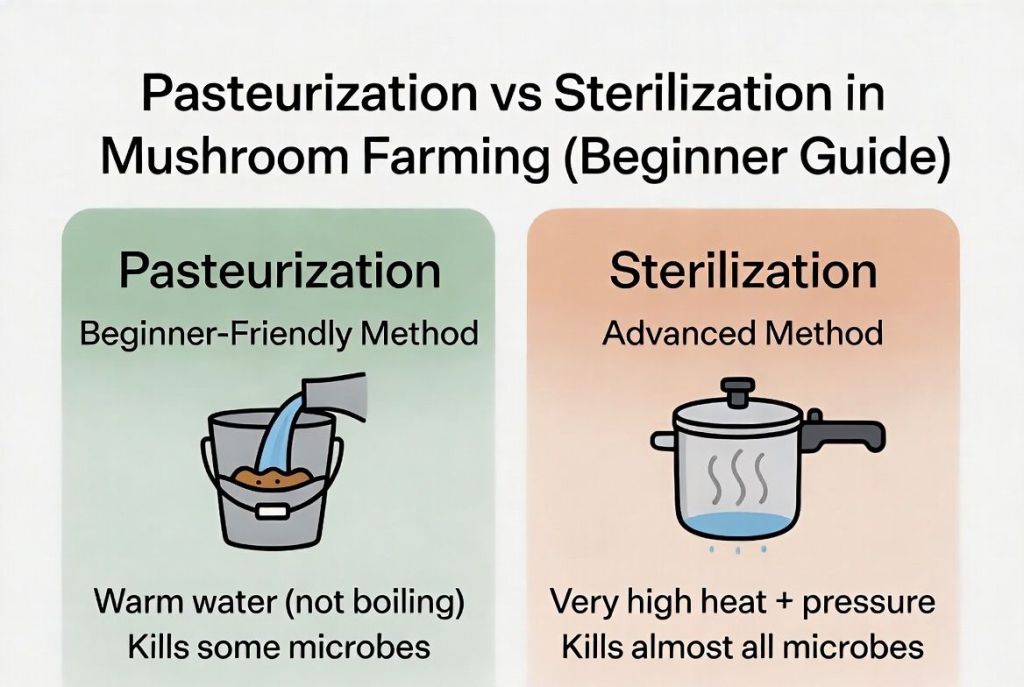
Pasteurization means using heat (or sometimes a chemical solution) to kill harmful germs inside your growing material called the substrate before you grow your mushrooms in it.
Here is a simple way to think about it.
When you drink water from a dirty source, you boil it first. That heat kills the bacteria that could make you sick. But if you boil it too long or at too high a heat, you destroy minerals that are actually good for you.
Pasteurizing mushroom substrate works the same way. You heat the material enough to kill competing organisms, things like mold spores and bacteria that would attack your mushrooms. But you do not heat it so much that you destroy everything good in it.
That balance is what this guide will help you get right.
2. Why Pasteurization Matters in Mushroom Farming
Your substrate, whether it is straw, sawdust, corn husks, or rice straw is full of microorganisms. Most of them are harmless. But some of them, like green mold (Trichoderma) and black mold, will grow much faster than your mushrooms if you give them the chance.
When you skip pasteurization, here is what happens:
- Mold spores that were already living in your straw or sawdust start growing the moment you add moisture.
- They spread faster than mushroom mycelium.
- By the time your mushrooms are trying to grow, the mould has already taken over.
- Your bag turns green, blue, or black and there is nothing left to save.
Many beginners see this happen and assume they bought bad spawn or did something wrong during inoculation. But the problem usually started much earlier, during substrate preparation.
Pasteurize correctly, and you give your mushrooms a clean, clear space to grow without competition.
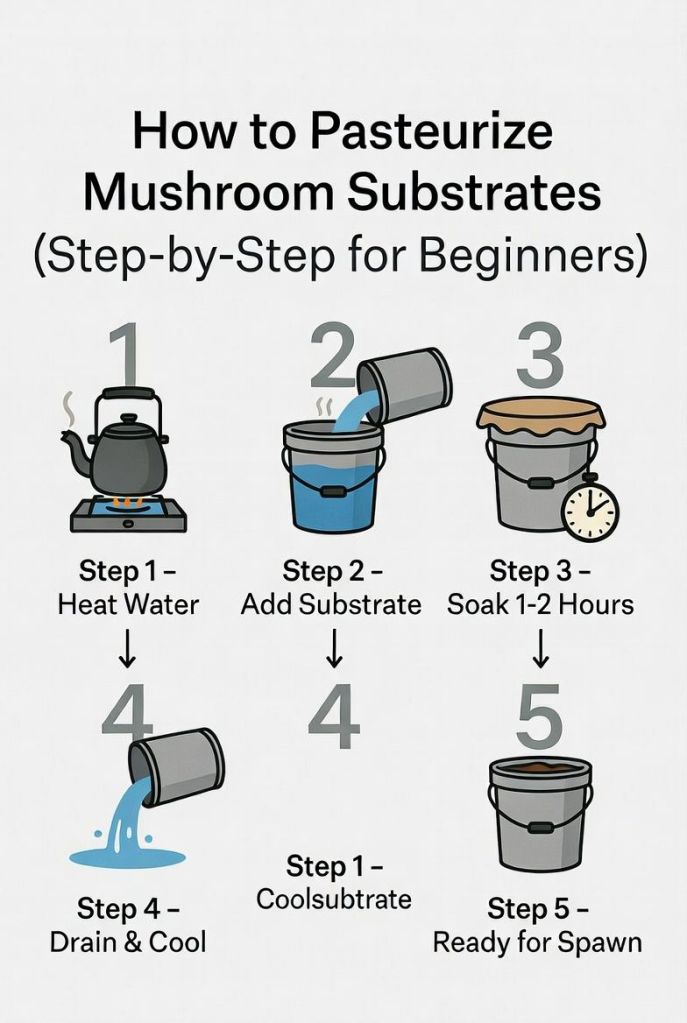
3. Step-by-Step: Hot Water Pasteurization (Beginner Method)
This is the easiest method for beginners. You only need a few simple items.
What you need:
- A large pot or metal drum
- Water
- A stove, gas burner, or firewood
- Your substrate (chopped straw or sawdust)
- A net bag, old pillowcase, or mesh sack
- A thermometer (helpful but not required)
- Tongs or gloves
Step 1: Chop your substrate
Cut your straw into pieces about 5–10 cm long. Shorter pieces pack more easily into bags and make better contact with the hot water. If you are using sawdust, this step is not needed.
Step 2: Fill your pot or drum with water
Use enough water to fully submerge your substrate. Place it on the heat source and begin warming it up.
Step 3: Load your substrate into a net bag
Put your chopped straw into a net bag, old pillowcase, or mesh sack. This makes it much easier to remove from the hot water when the time comes. You can also put the straw directly into the pot, but removing it will be harder.
Step 4: Heat the water to the right temperature
This is the most important step. Read the next section carefully before doing this.
Bring the water up to between 65°C and 75°C. This is hot, you cannot hold your hand in it, but it is not fully boiling. If you do not have a thermometer, look for small bubbles forming at the bottom of the pot. Full rolling boil is too hot. Small bubbles mean you are near the right temperature.
Step 5: Submerge the substrate and hold the temperature
Lower the bag of straw into the hot water. Place a weight on top; a heavy lid, a clean rock, or a metal plate, to keep it fully underwater.
Maintain that temperature for 1 to 2 hours. Do not let it go cold. Do not let it reach a full boil. Adjust your heat source to keep the water in the right range.
Step 6: Remove, drain, and cool
After 1 to 2 hours, remove the bag from the hot water using tongs or gloves. Hang it up to drain. The substrate needs to release excess water before you use it.
Then spread the drained substrate on a clean surface and let it cool completely. This is very important: never add spawn to hot substrate. Heat will kill it instantly.
Wait until the substrate feels warm not hot to the touch. Room temperature is ideal.
4. The Right Temperature and Time
Many beginners either overheat or under-heat the substrate. Both cause problems.
Situation and what happens
- Too cold (below 60°C): Harmful organisms survive
- Just right (65°C – 75°C): Harmful organisms die, good bacteria survive
- Too hot (above 82°C or full boil): Too much is destroyed, contamination risk goes up
Time guide:
- Hot water pasteurization: 1 to 2 hours at 65–75°C
- Lime bath (cold method): 12 to 18 hours soaking time
- Cold water fermentation: 5 to 7 days (not recommended for beginners)
If you do not have a thermometer, invest in a basic kitchen one. They are inexpensive and remove a lot of guesswork. With practice, you will learn to judge the right temperature by the look and sound of the water.
5. Cold Pasteurization: The Lime Bath Method
Hot water pasteurization works well, but it uses energy and requires you to maintain heat for 1 to 2 hours. If you want a simpler, lower-cost method especially for larger batches try the lime bath.
This method is very popular with farmers in Nigeria, Kenya, and Ghana because it requires no fire or stove. It uses hydrated lime (sometimes called calcium hydroxide or slaked lime). You can buy it at a hardware store or agricultural supply shop for very little money.
What you need:
- A clean bucket or drum (large enough for your substrate)
- Water
- Hydrated lime (not garden lime, not quicklime – hydrated lime)
- Your substrate (straw works best for this method)
- Gloves (lime can irritate skin)
How to do it:
Step 1: Fill your bucket or drum with clean water.
Step 2: Add hydrated lime at a ratio of about 1 cup of lime per 5 litres of water. Stir well. The water will turn milky white and feel slightly warm. That is normal.
Step 3: Submerge your chopped straw completely in the lime solution. Use a weight to keep it underwater.
Step 4: Leave it to soak for 12 to 18 hours. You can do this overnight.
Step 5: Remove the straw and drain it thoroughly. Rinse lightly with clean water if needed.
Step 6: Spread on a clean surface and let it cool and air out for 1 to 2 hours before using.
The high pH of the lime solution kills competing organisms the same way heat does, by breaking down their cell walls. The lime does not harm your mushroom spawn as long as you drain and air the substrate properly before inoculating.
6. Common Mistakes Beginners Make
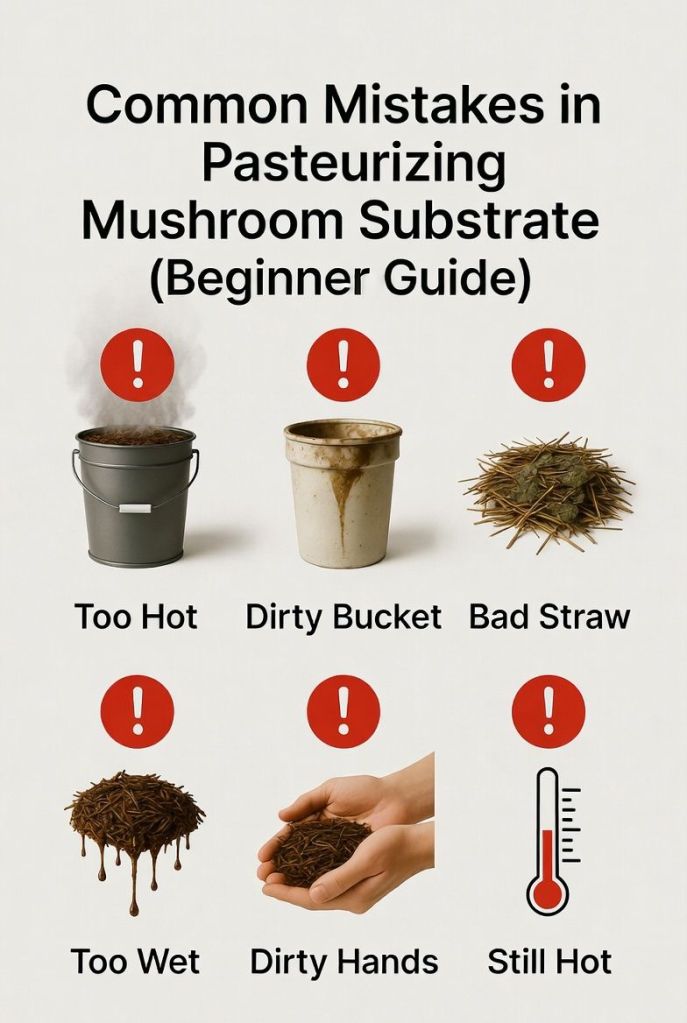
Using water that is boiling or too hot. Full boiling (100°C) is sterilization, not pasteurization. It destroys helpful bacteria and can make your substrate more vulnerable to contamination afterward, not less.
Not draining the substrate properly. Substrate that is too wet after pasteurization creates perfect conditions for mold. Squeeze a handful, only a few drops should come out.
Adding spawn before the substrate has cooled. Hot substrate kills spawn. Always wait until the substrate is at room temperature.
Using dirty hands or tools. After all that work, introducing bacteria through an unwashed hand or unclean tool defeats the purpose. Wash hands thoroughly. Wipe down surfaces with a mild disinfectant.
Using old, moldy, or low-quality straw. If your straw already has visible mold on it, pasteurization may not be enough. Start with the cleanest substrate you can find.
Leaving pasteurized substrate exposed too long before using it. Once pasteurized and cooled, your substrate is clean but also vulnerable, it has no competition left to protect it. Use it within a few hours. Do not leave it open and uncovered overnight.
Skipping the weight during hot water pasteurization. Straw floats. The parts above the water line do not get pasteurized properly. Always keep the substrate fully submerged.
Using the wrong type of lime. For lime bath pasteurization, use hydrated lime (calcium hydroxide). Quicklime and garden lime behave differently and are not the same thing.
7. How to Know Pasteurization Worked
You cannot see bacteria or mould spores, but there are a few signs that your substrate is ready.
Good signs:
- The substrate smells clean and slightly earthy, like fresh straw or wet soil
- It is moist but not dripping. A handful produces only a few drops when squeezed
- It is warm or at room temperature, not hot
- The colour looks natural, no green, black, pink, or unusual patches
Warning signs:
- Strong sour or ammonia smell (substrate may be over-fermented or too wet)
- Slimy texture
- Visible coloured patches (green, black, or pink mould already forming)
- Water streaming freely when you squeeze it (too wet)
If you see warning signs, do not inoculate. Spread the substrate out in the sun for an hour and re-evaluate. A very sour smell may improve with more draining and airing. Visible mould means you need to start again.
8. What to Do Immediately After Pasteurization
Once your substrate has cooled and passed the checks above, you are ready for the next step: inoculation.
Here is the quick sequence:
1. Let it cool completely. Room temperature is the target.
2. Work in a clean space. Wipe your surface with a mild disinfectant. Wash your hands.
3. Mix in your mushroom spawn. A standard ratio is about 10–15% spawn by weight of substrate. Mix evenly so the spawn spreads throughout.
4. Pack into clean bags. Use breathable bags with small holes or filter patches. Seal them.
5. Move to your incubation space. Keep bags in a warm, dark room at 20–28°C (for oyster mushrooms) until the white mycelium fully colonises the substrate.
For the full guide on what happens from this point, including incubation, fruiting, harvesting, and selling, see our complete guide: (Mushroom Farming in Africa)
Conclusion
Pasteurization is not complicated. You are simply cleaning your substrate so your mushrooms have a fair chance to grow without competition.
Get the temperature right (65–75°C for 1 to 2 hours, or a lime bath overnight). Drain it well. Let it cool before adding spawn. Work in a clean space.
Do those things consistently, and your success rate in mushroom farming will improve significantly. Most failed batches that beginners blame on spawn or growing conditions actually trace back to this one step.
Get pasteurization right, and everything else becomes easier.

Leave a reply to The ABCs of Mushroom Farming: Benefits, Types, and Suitable Growing Conditions – Kiki's Agroplace Cancel reply